> ## Documentation Index
> Fetch the complete documentation index at: https://docs.gogogotoken.ai/llms.txt
> Use this file to discover all available pages before exploring further.
# CC Switch 安装
> Windows 和 macOS 安装 CC Switch 的完整指南
CC Switch 是一款免费开源的桌面应用,主要用于管理 Codex、Claude Desktop 等 AI 工具的供应商切换与本地路由接管。
在一个界面里管理多个 AI 客户端的 Provider 与路由配置。
适合 Codex、Claude Code、Gemini CLI 等工具的日常切换场景。
用图形界面代替手动改配置文件,减少出错概率。
它适合这几类场景:
* 需要在官方账号和第三方 API 之间切换
* 想保留 Codex / Claude 的官方登录态
* 需要把 AI 工具接到第三方模型供应商
> 截图与文件名示例基于 `CC Switch v3.16.1` 官方发布页。实际下载时请以 GitHub Releases 最新版本为准截图与文件名示例基于 `CC Switch v3.16.1` 官方发布页。实际下载时请以 GitHub Releases 最新版本为准,避免第三方假冒安装包。
## 官方下载
* 发布页:`[CC Switch Releases](https://github.com/farion1231/cc-switch/releases)[Releases](https://github.com/farion1231/cc-switch/releases/tag/v3.16.1)`
* 示例版本:[`CC Switch v3.16.1`](https://github.com/farion1231/cc-switch/releases/tag/v3.16.1)
* 示例版本:[`CC Switch v3.16.1`](https://github.com/farion1231/cc-switch/releases/tag/v3.16.1)
* 官方仓库:[`farion1231/cc-switch`](https://github.com/farion1231/cc-switch)
## 推荐下载
推荐下载最新版本中的 `Windows.msi` 安装包最新版本中的 `Windows.msi` 安装包。适合 Windows 10 及以上,支持自动更新。
推荐下载最新版本中的 `macOS.dmg` 安装包最新版本中的 `macOS.dmg` 安装包。适合 macOS 12 及以上,拖入 `Applications` 即可。
 ## Windows 安装
### 系统要求
* Windows 10 及以上
* x64 架构
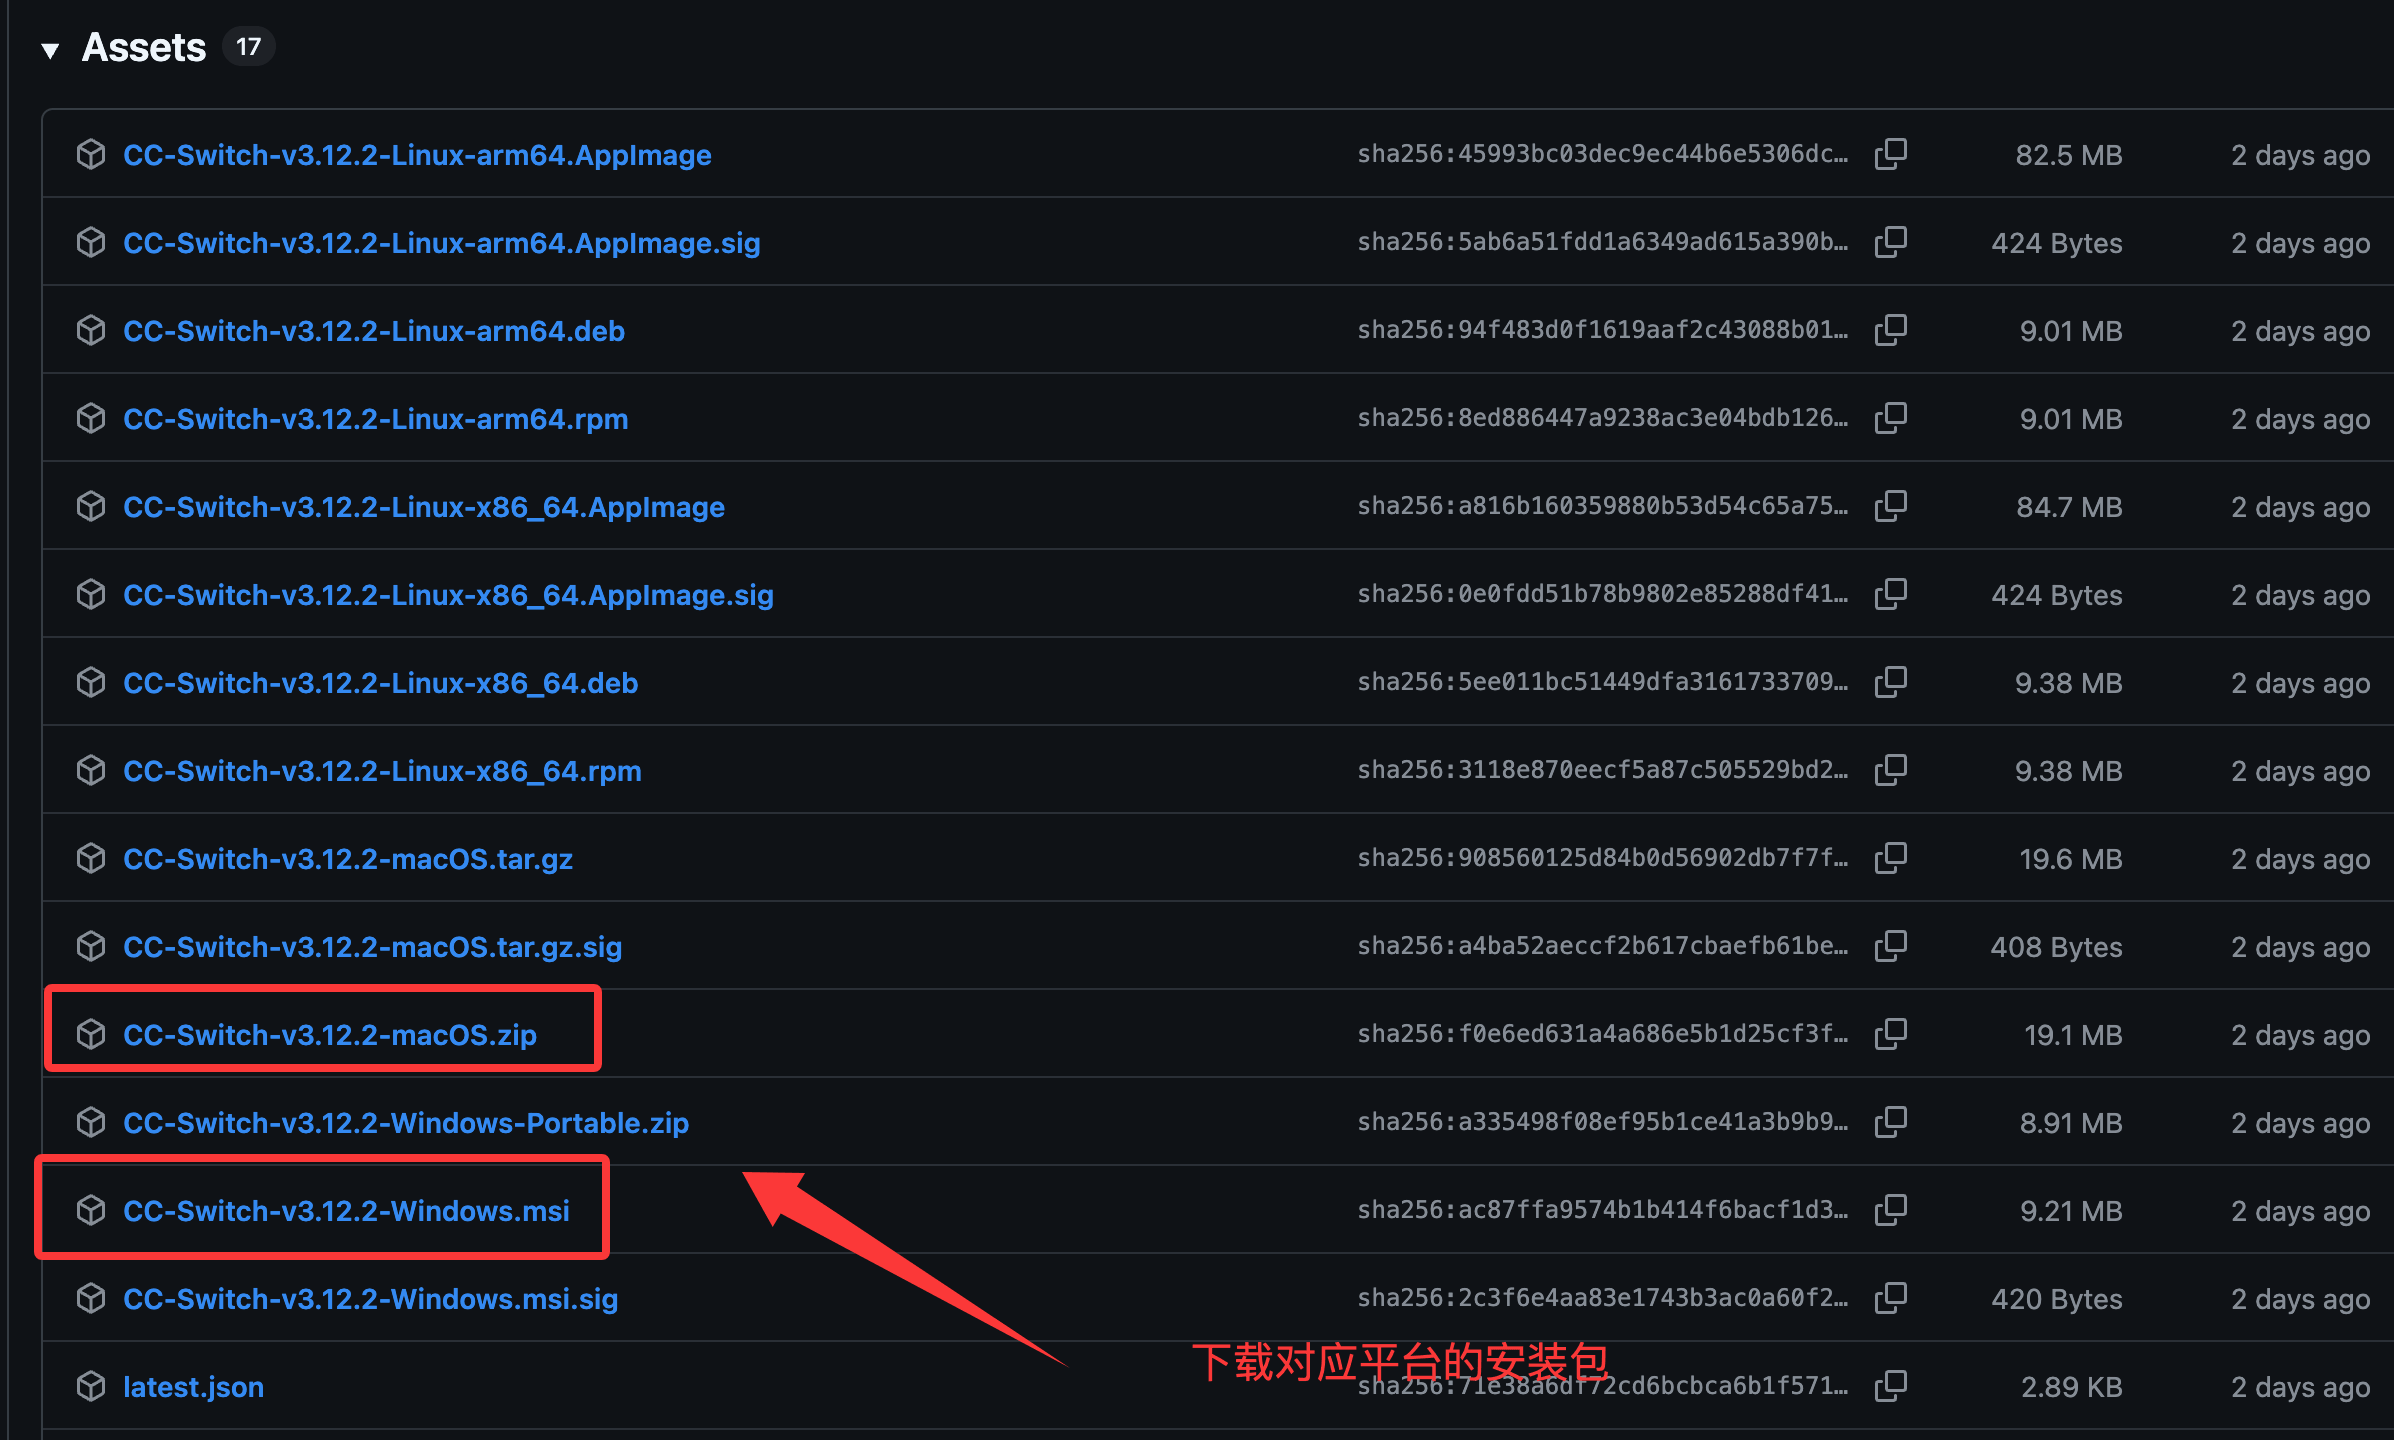
进入官方 Releases 页面,找到最新版本最新版本对应的安装资源。
下载最新版本中的 `Windows.msi` 安装包最新版本中的 `Windows.msi` 安装包。
这是官方推荐方式,支持自动更新。
双击安装包,按照安装向导完成安装。
安装完成后,在开始菜单搜索 `CC Switch` 并启动,然后按需配置 Codex / Claude 供应商。
### 便携版
如果你不想写入注册表,可以下载:
* `CC-Switch-**-Windows-Portable.zip`
解压后直接运行即可。
## macOS 安装
### 系统要求
* macOS 12 (Monterey) 及以上
* Intel x64 或 Apple Silicon
进入官方 Releases 页面,找到最新版本最新版本对应的 macOS 安装资源。
下载最新版本中的 `macOS.dmg` 安装包最新版本中的 `macOS.dmg` 安装包。
这是官方推荐方式,拖入 `Applications` 即可。
双击打开 DMG,然后将 `CC Switch` 拖入 `Applications` 文件夹。
首次启动后,按系统提示完成授权与基础配置。
### 其他安装方式
* `CC-Switch-**-macOS.zip`:解压后拖入 `Applications`
* `CC-Switch-**-macOS.tar.gz`:用于 Homebrew 安装和自动更新
如果你使用 Homebrew,也可以直接安装:
```bash theme={null}
brew install --cask cc-switch
```
更新时执行:
```bash theme={null}
brew upgrade --cask cc-switch
```
## 快速上手
安装完成后,建议按下面的顺序完成首次配置。
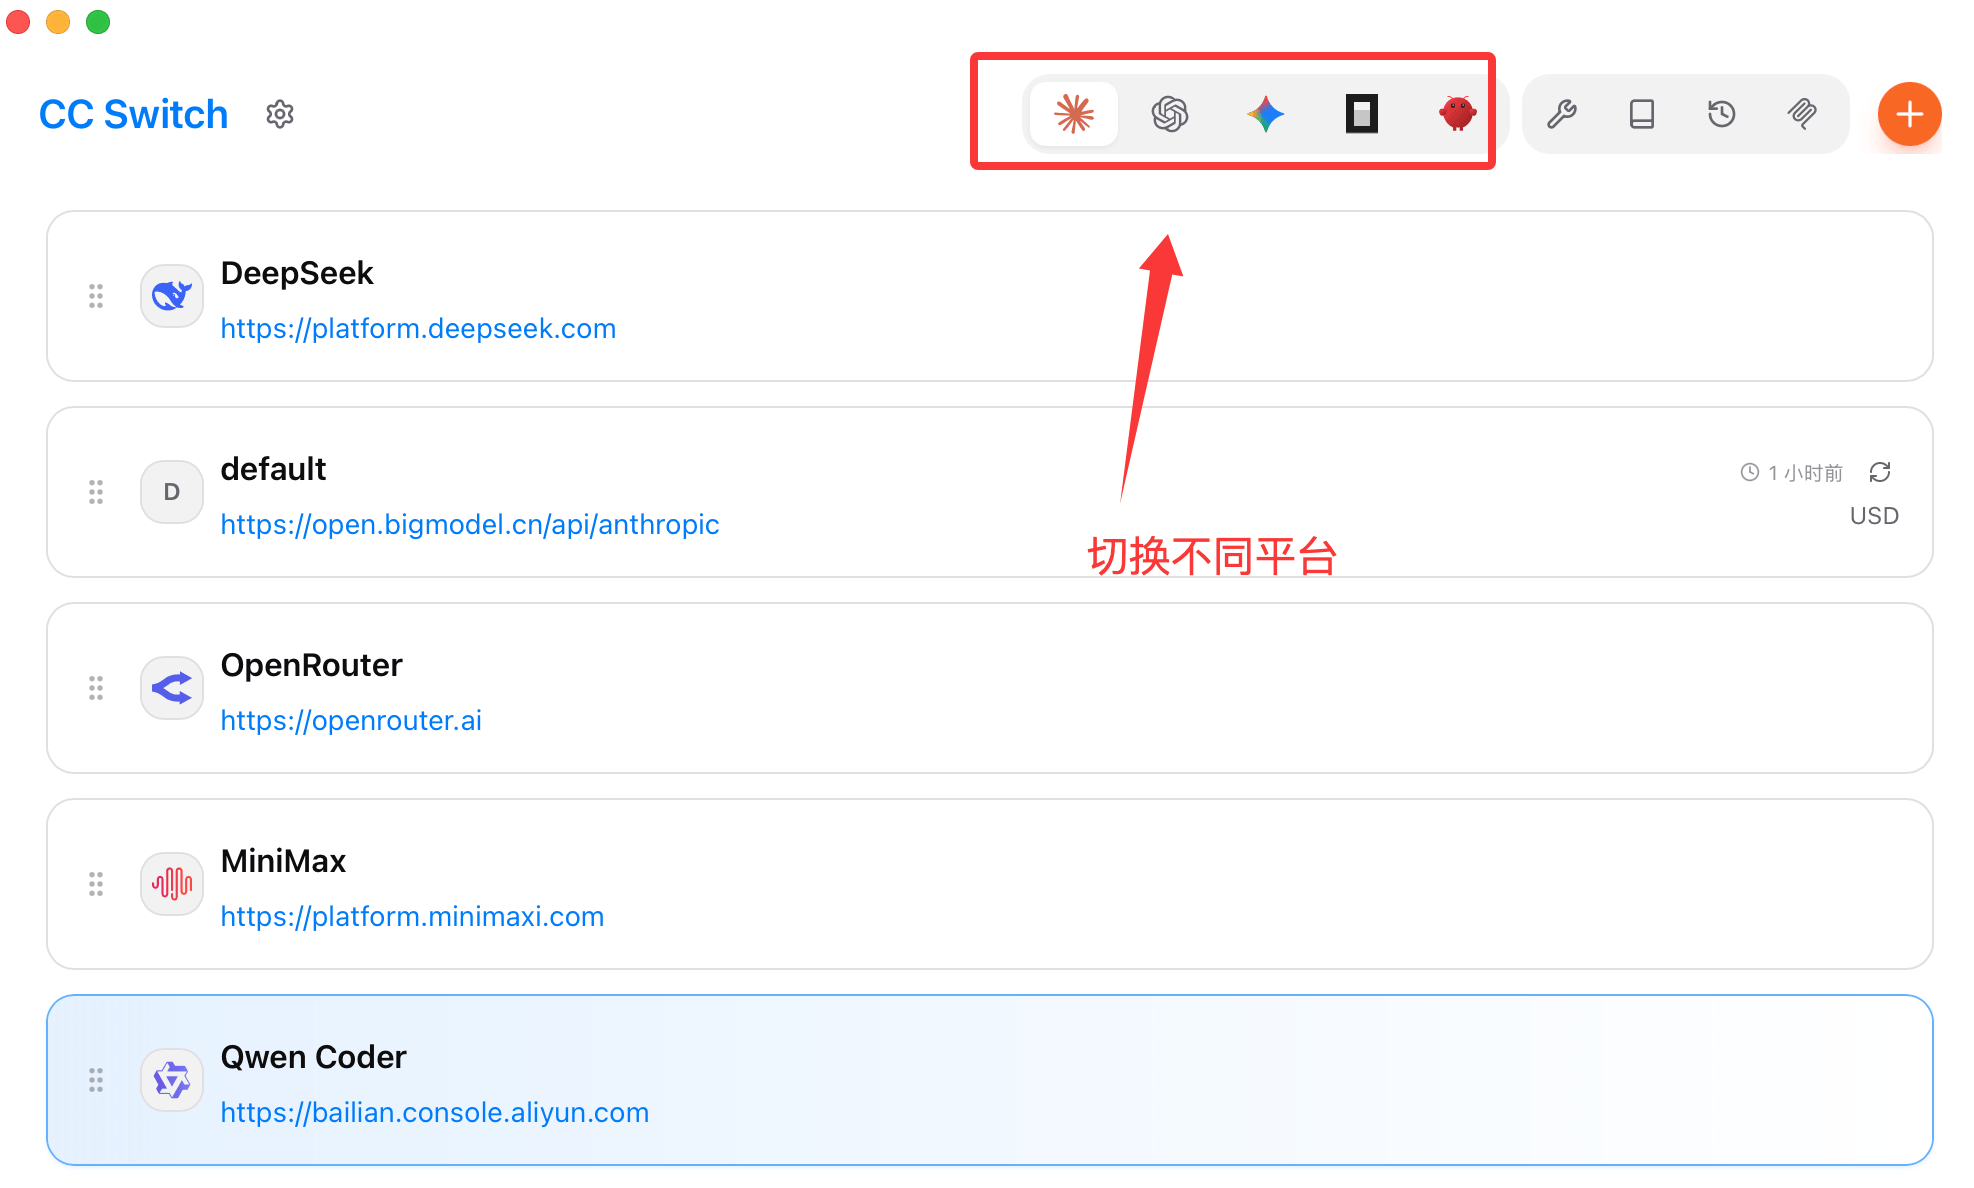
首次启动后,CC Switch 会自动检测已安装的 CLI 工具。你可以在顶部应用切换栏中选择当前要管理的应用,比如 Claude Code、Codex 或 Gemini CLI。
## Windows 安装
### 系统要求
* Windows 10 及以上
* x64 架构
进入官方 Releases 页面,找到最新版本最新版本对应的安装资源。
下载最新版本中的 `Windows.msi` 安装包最新版本中的 `Windows.msi` 安装包。
这是官方推荐方式,支持自动更新。
双击安装包,按照安装向导完成安装。
安装完成后,在开始菜单搜索 `CC Switch` 并启动,然后按需配置 Codex / Claude 供应商。
### 便携版
如果你不想写入注册表,可以下载:
* `CC-Switch-**-Windows-Portable.zip`
解压后直接运行即可。
## macOS 安装
### 系统要求
* macOS 12 (Monterey) 及以上
* Intel x64 或 Apple Silicon
进入官方 Releases 页面,找到最新版本最新版本对应的 macOS 安装资源。
下载最新版本中的 `macOS.dmg` 安装包最新版本中的 `macOS.dmg` 安装包。
这是官方推荐方式,拖入 `Applications` 即可。
双击打开 DMG,然后将 `CC Switch` 拖入 `Applications` 文件夹。
首次启动后,按系统提示完成授权与基础配置。
### 其他安装方式
* `CC-Switch-**-macOS.zip`:解压后拖入 `Applications`
* `CC-Switch-**-macOS.tar.gz`:用于 Homebrew 安装和自动更新
如果你使用 Homebrew,也可以直接安装:
```bash theme={null}
brew install --cask cc-switch
```
更新时执行:
```bash theme={null}
brew upgrade --cask cc-switch
```
## 快速上手
安装完成后,建议按下面的顺序完成首次配置。
首次启动后,CC Switch 会自动检测已安装的 CLI 工具。你可以在顶部应用切换栏中选择当前要管理的应用,比如 Claude Code、Codex 或 Gemini CLI。
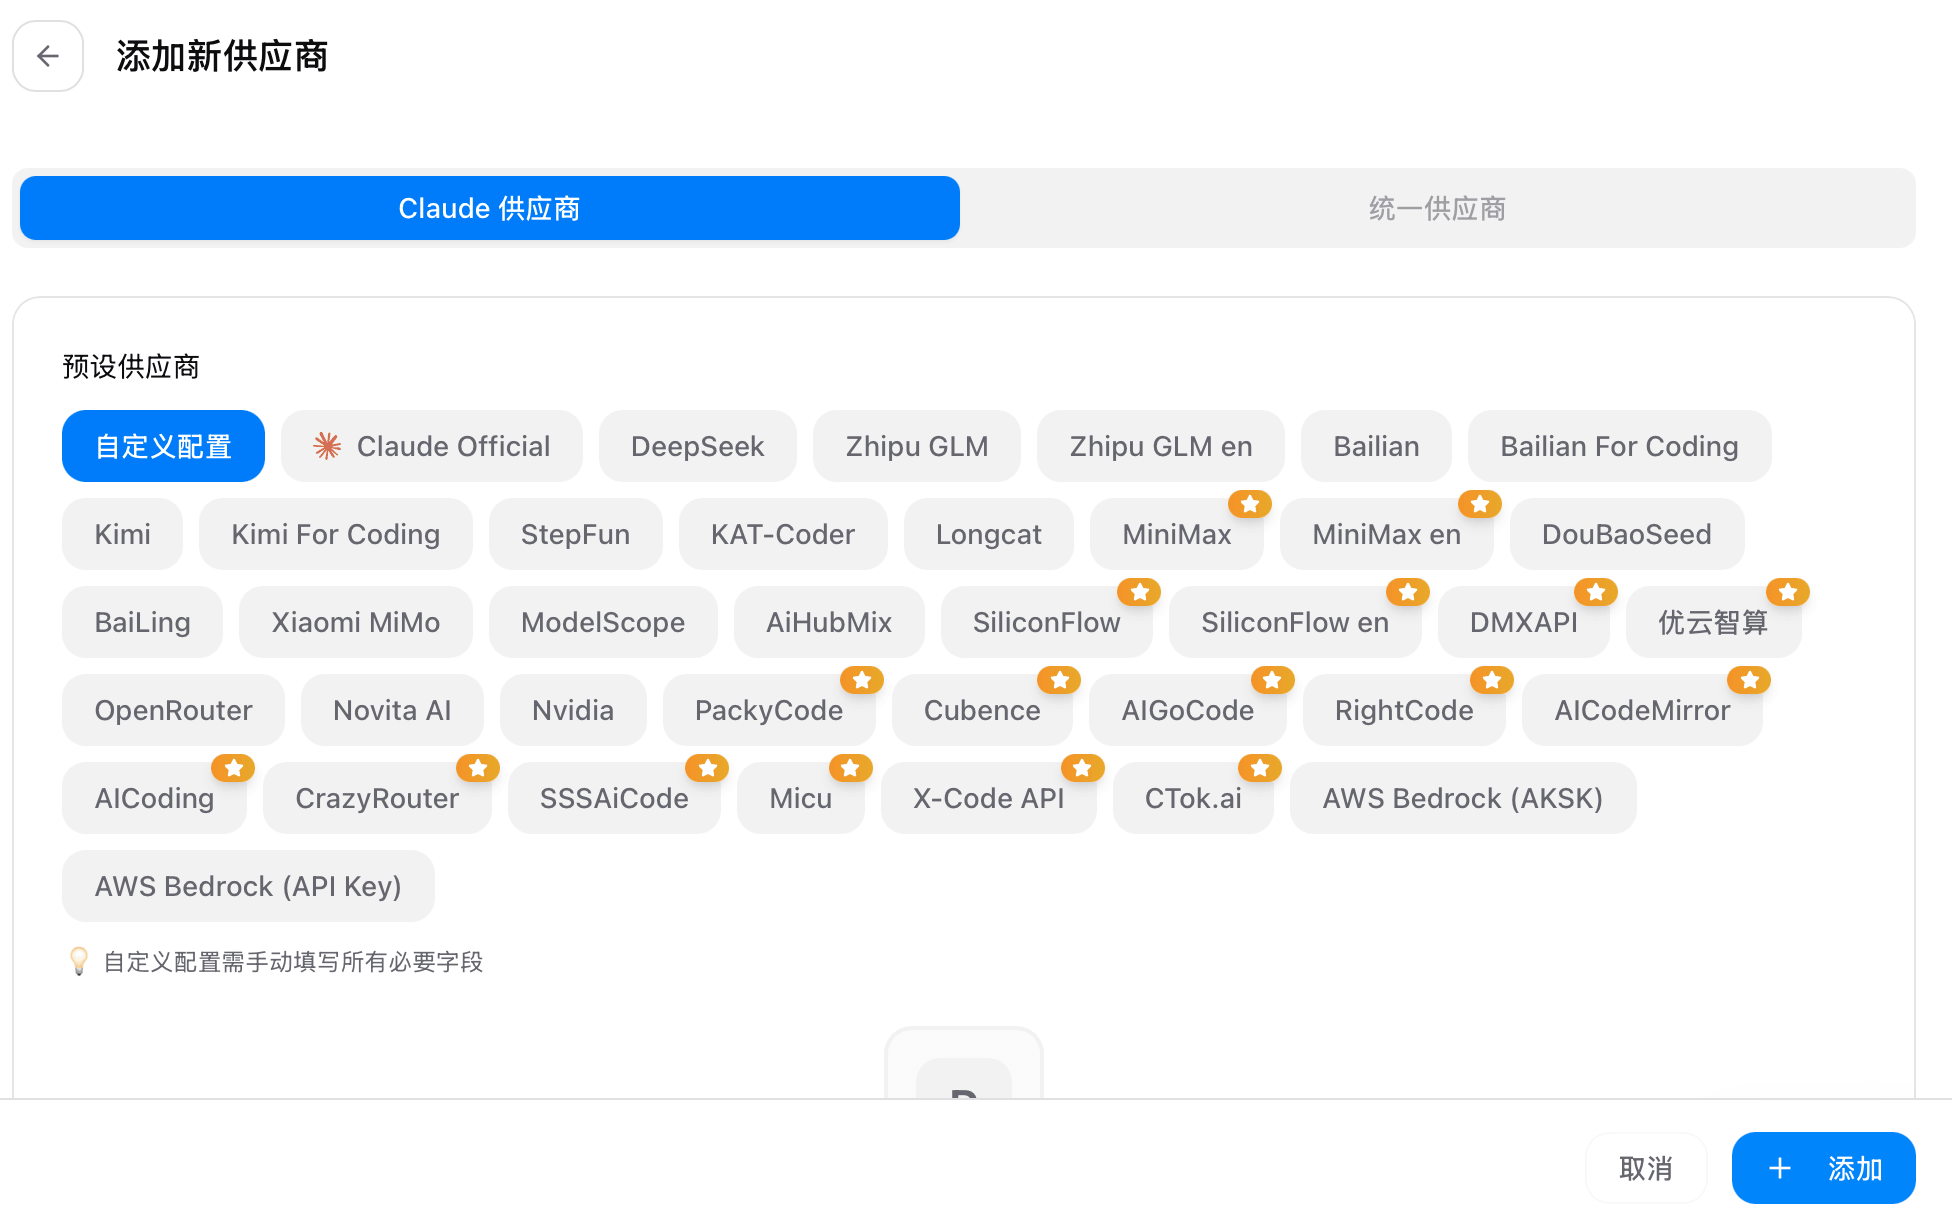
 进入 Provider 管理界面后,新增一个供应商配置,填写名称、Base URL、API Key 以及需要的模型映射。
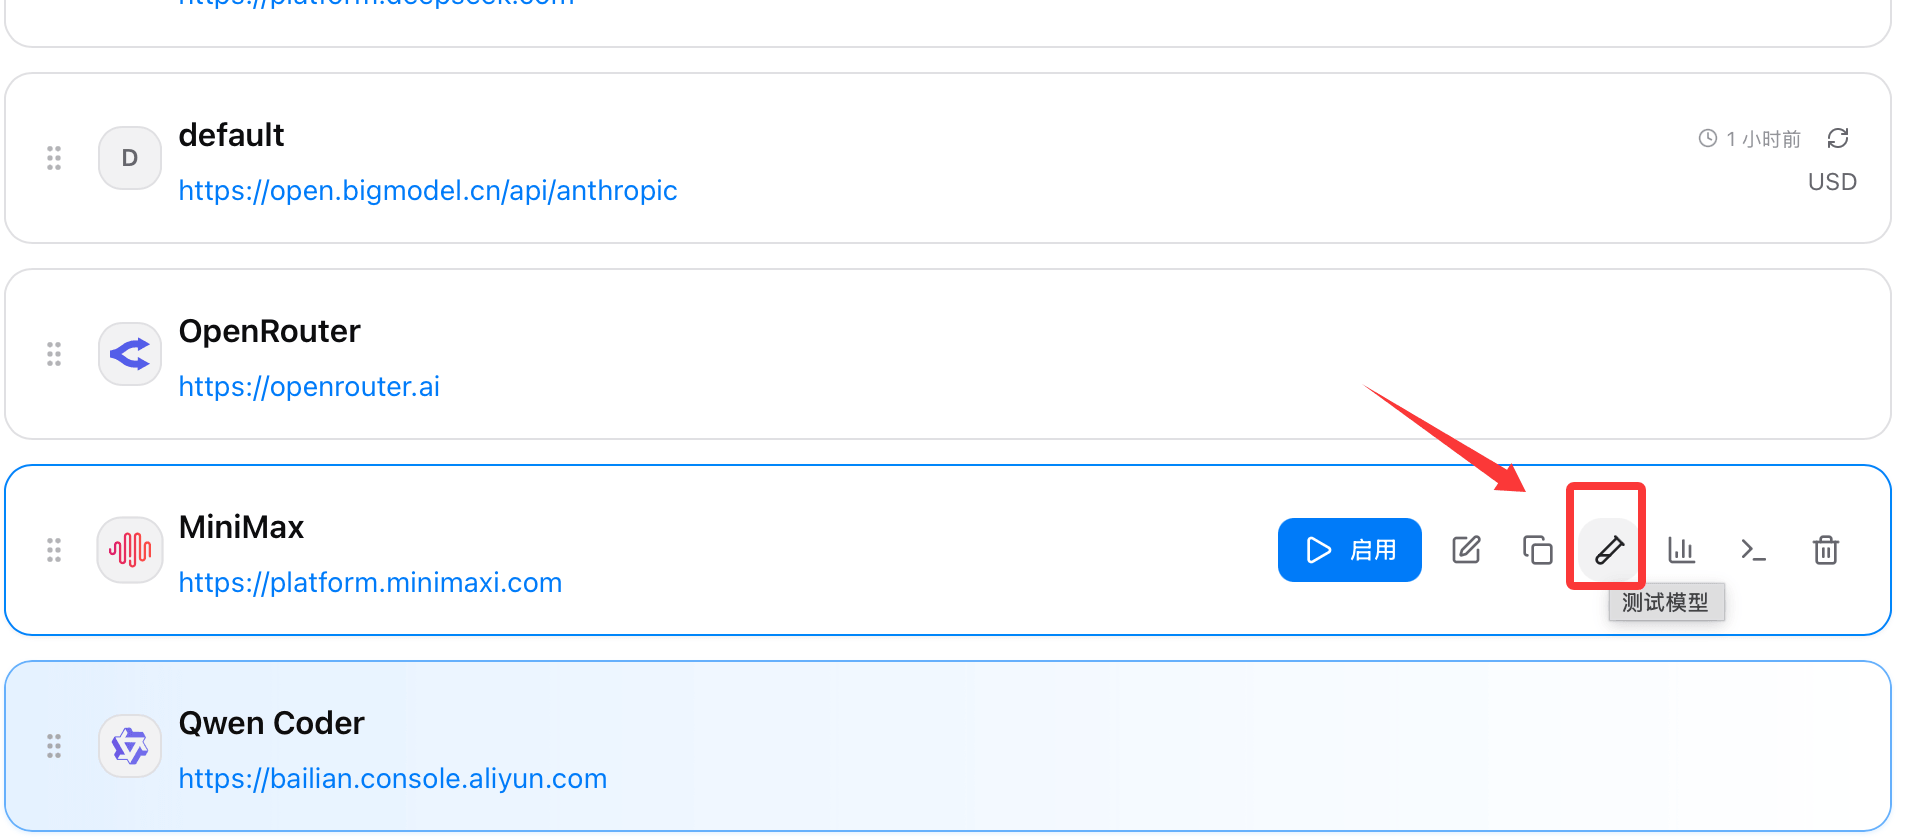
 在 Provider 列表中选择目标配置,然后点击“启用”。CC Switch 会把配置写入对应 AI 客户端的配置文件。
 启用后,建议立刻执行一次“健康检查”,确认 API Key、网络连通性和上游响应都正常。
 修改模型映射或供应商后,通常需要重启对应 AI 客户端,否则新配置可能不会立即生效。
## 重要提醒
* 只从 GitHub Releases 下载,不要使用来历不明的“CC Switch”网站
* 如果你要保留官方登录态,再切换第三方供应商,建议先阅读官方说明后再开启相关功能
修改模型映射或供应商后,通常需要重启对应 AI 客户端,否则新配置可能不会立即生效。
## 重要提醒
* 只从 GitHub Releases 下载,不要使用来历不明的“CC Switch”网站
* 如果你要保留官方登录态,再切换第三方供应商,建议先阅读官方说明后再开启相关功能